Released in version: 2016.4.2.0
In order to be able to apply a credit note, you need to proceed with the invoicing process as you normally would. This includes submitting a charge/time entry/recurring fee, accepting it, transferring WIP to billing, and posting the invoice.
See the following articles for more information:
Invoicing 2: Time entries, charges
Invoicing 3: Review time records
Invoicing 4: Transfer WIP to billing and post client invoices
Once the invoice has been posted, we can create a credit memo.
To create a credit memo
- Click Time and billing > Lists > Invoices.
- Click Find all.
- Locate and right-click the invoice you would like to add a credit note to.
- Select Create a credit memo. The Credit note window will display.
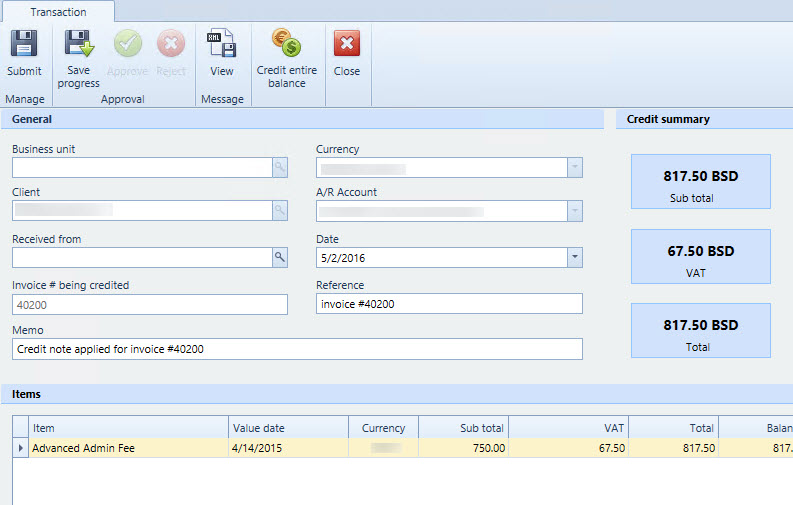
 Fields from the invoice will be automatically filled in (such as Currency, Client name, A/R account and Invoice number). The fees will display under the Items list.
 - If necessary, you can change the Date and Reference memo.
- To enter an amount of credit, find the Amount to credit column under Items and enter the new number there. Press ENTER on your keyboard once you are satisfied with the amount. If you want to credit the entire amount, click the Credit entire balance button at the top of the form. The Amount to credit field will populate with the full amount.
 If there is VAT, it will recalculate and take that amount into consideration.
 - When complete, click Submit.
- Click Client administration > Lists > Unposted transactions.
- Locate and right-click the transaction and select Approve.
- Click Time and billing > Lists > Invoices.
- The Credits applied and Balance columns will now update with the current information. You can also apply multiple credits. On the Invoices list, right-click the invoice again and select Create a credit memo and apply. You cannot exceed the remaining balance in the Amount to credit column.
See also
How to use the receive cash form to receive partial and full payments
Comments
0 comments
Please sign in to leave a comment.